top of page
HOW DO I USE THE SUSHI MAKING KIT?
Nine easy steps to turn you from a novice to a professional.
Nothing is impossible, if you put your mind to it and have the right teacher and instructions.
QUICK AND EASY GUIDE
With every sushi kit, comes with a quick and easy instruction guide. If you require more details and videos to help with your culinary journey you may refer to the links below for assistance.

VIDEO INSTRUCTIONS
VIDEO INSTRUCTIONS
We are happy to share with you the perfect sushi rice video tutorial. One of the most important steps in making sushi is cooking the rice to perfection, this video explains it and is easy to follow.
Anchor 1
LETS SHOW YOU HOW TO MAKE A CALIFORNIA ROLL
We love California rolls, and when you don't know what to make for lunch or dinner this is a quick easy 9 step process that will be therapeutic and rewarding, especially after you take a bite.
WRITTEN INSTRUCTION GUIDE:
1. Getting the Bamboo Mat and Tea Cloth Ready
-
Open the tea cloth and put it under running water and drain out all the excess water from the tea cloth.
-
Once it is slightly damp, lay it flat on the table
-
Lay the bamboo mat on the tea cloth (this will ensure that sushi rice will not stick and it will also protect your food from splinters).
-
Wrap the tea cloth around the bamboo mat
NOTE: The bamboo mat is 100% natural and there may be some splinters. Many competitors ignore safety and the environment, but our product provides the essentials for your wellness.


2. Place Nori On The Tea Cloth
NOTE: Rough side facing up

3. Grab a bowl of water
Grab a bowl of water to dip the rice paddle in the water and scoop the rice (the moisture on the paddle will prevent rice sticking to the paddle).
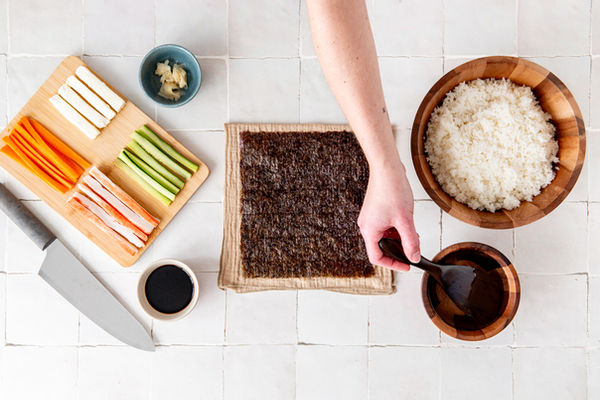
4. Spread the rice onto the Nori
Scoop the rice, place it on the nori (many other kits ask that you use a Bazooka - the Bazooka tool requires a lot of rice and it becomes starch and carb heavy - thus, we do not recommend using a bazooka tool .
Dampen the rice spreader and spread the rice evenly across the nori.


5. Flip if desired
NOTE: Depending on your preference or the type of sushi, you can have the nori or rice face outside.
For this example we have the rice facing outside, but the process is the same either way.

6. Add Ingredients

7. Time to Roll


8. Cut, serve, and enjoy!


bottom of page